





Pepper the Giant Purple Dog
Seven cards is all anyone starts with in UNO, and that small hand hides more decision-making than the bright colors let on. A deck this simple wouldn’t still show up at family game nights, dorm rooms, and tournament tables decades later if the choices inside it were actually shallow.
| Genre | Shedding card game |
| Players | 2–10 |
| Starting Hand | 7 cards |
| Win Target | 500 points |
Dealing In and Building the Discard Pile
A round starts with seven cards dealt to every player and the rest set aside as the draw pile. Flipping the top card into a discard pile gives everyone their first target color and number to match, and from there the game moves in a strict rotation until someone empties their hand. New players tend to assume any card can go down at almost any time, then get stuck holding a full hand while realizing color and number both have to line up unless a Wild bails them out.
Drawing only happens when nothing in hand is playable, and even then the drawn card goes down immediately if it happens to fit. That small rule trips up beginners constantly, since the instinct is to draw and automatically end the turn instead of checking whether the new card is playable first.
Action cards complicate the rotation fast. Skip removes the next player’s turn outright, Reverse flips the direction of play, and Draw Two forces the next player to pick up two cards and lose their turn. In a two-player game specifically, Reverse behaves exactly like a second Skip, sending the turn straight back to whoever just played it.
The Jump-In and Seven-O House Rules
Two house rules show up in enough groups that most experienced players treat them as close to standard. Jump-In lets any player slap down an identical card out of turn — same color and number as the one on top — instantly taking over the turn order regardless of whose turn it actually was. It rewards players who are watching the discard pile closely instead of only their own hand.
Seven-O works differently: playing a 7 lets that player swap their entire hand with any other player’s hand, while playing a 0 forces every player at the table to pass their hand to the next person in the direction of play. Groups that adopt Seven-O tend to find it swings games wildly, since a strong hand can get handed straight to an opponent with no warning.
- Jump-In: play an exact match out of turn
- Seven-O: swap or rotate hands on a 7 or 0
- Stacking: chain Draw Twos onto the next player
Stacking Draw Twos is the most divisive of the three, since official Mattel rules don’t support it at all, yet plenty of tables treat it as unwritten law. Whether a group allows it usually gets settled before the first hand is even dealt.
Wild Draw Four and the Challenge Rule
The Wild Draw Four is the card most likely to start an argument, because it can only legally be played when the person holding it has no other card matching the current color. Anyone hit with it can challenge, forcing the player who dropped it to reveal their hand. A false play means drawing four cards instead of handing them out; a clean bluff caught wrongly means the challenger draws six instead of four.
This challenge mechanic is why experienced players hold onto a matching-color card even when a Wild Draw Four sits in their hand — playing it too early without justification is an easy way to hand a penalty right back to yourself.
- Do you have to call UNO on your second-to-last card? Yes, the call happens the moment you play down to one card remaining, not before. Missing it lets any other player catch the mistake before the next turn begins and force a two-card penalty draw.
- What happens if the draw pile is used up mid-round? The discard pile is reshuffled, minus whatever card is currently active on top, and becomes the new draw pile without pausing play.
- Can a regular Wild card be played with a matching color already in hand? Yes, the standard Wild has no restriction. Only the Wild Draw Four carries the no-matching-color requirement that makes it challengeable.
UNO keeps its edge because a hand of seven cards forces constant small decisions, and once Jump-In, Seven-O, or a contested Wild Draw Four enters the mix, a game that looks like pure luck to an outsider turns into something a table full of regulars will argue about long after the cards are back in the box.
MECCHA CHAMELEON looks like it should be an easy game of hide and seek until you realize the chameleon you’re hunting has painted itself into the exact color of the wall behind it, and the only way to catch it is to stop trusting your eyes and start checking every surface in the room by hand.
Hunter Versus Chameleon: The Core Loop
Every round splits players into two roles: a hunter searching a level, and one or more chameleons trying to avoid being found before time runs out. Chameleons can paint themselves to match nearby surfaces, blending into walls, floors, and objects well enough that a hunter scanning at a glance can walk right past one standing in plain sight. The hunter’s job is to find every chameleon hiding in the level before the clock expires.
New hunters tend to rely on movement to spot chameleons, expecting something to twitch or shift out of the corner of their eye. Experienced chameleons know this and hold perfectly still, which means the more reliable habit is checking suspicious color seams and edges directly rather than waiting for motion that experienced hiders simply won’t give away.
From the chameleon’s side, picking a hiding spot is about more than finding a matching color. A surface that’s too obvious a hiding spot draws a hunter’s attention regardless of how well the color blends, so reading which parts of a level a hunter is likely to check first matters as much as the paint job itself.
The White Bipedal Character at the Center of It
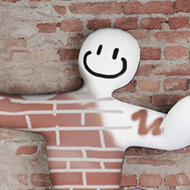
Both roles are played by the same white bipedal character model, which keeps the visual identity of the game consistent whether a player is currently hunting or hiding. There’s no separate character design distinguishing hunters from chameleons beyond the role they’re currently filling and, for chameleons, whatever color they’ve painted themselves at that moment.
That shared character design puts the entire visual tension on color and camouflage rather than on distinct hunter and hider models, which is part of why a well-hidden chameleon can be genuinely difficult to separate from the environment around it.
Fifteen Million Copies and the Fastest-Selling Game of 2026
MECCHA CHAMELEON sold more than fifteen million copies by July 5, reaching a peak of 340 thousand concurrent players, and has been described as the fastest and best-selling video game of 2026. That kind of reception for a game built around a single hide-and-seek premise says a lot about how much depth the hunter-versus-chameleon dynamic actually has once players start exploiting camouflage and search patterns against each other.
The official release is a paid title on Steam, released for Windows. It’s worth being direct about that distinction: the acclaimed, best-selling MECCHA CHAMELEON that reached fifteen million copies is this Steam release specifically, separate from any unofficial browser-based hide-and-seek games elsewhere that simply borrow the same name and premise.
How do chameleons hide in MECCHA CHAMELEON?
By painting themselves to match nearby surfaces — walls, floors, or objects — and then holding still, since movement is often what actually gives away a well-camouflaged hiding spot to an observant hunter.
Do hunters and chameleons use different character models?
No. Both roles use the same white bipedal character, with the chameleon’s current paint color being the main visual difference between a hider and anyone else in the level.
How successful has MECCHA CHAMELEON been?
It sold over fifteen million copies by July 5, peaked at 340 thousand concurrent players, and has been called the fastest and best-selling video game of 2026.
MECCHA CHAMELEON turns a simple premise into something genuinely tense in practice, and once a hunter learns to stop scanning for movement and start checking suspicious edges directly, the fifteen million copies sold start making a lot more sense as a reflection of how much cat-and-mouse depth is packed into painting yourself the same color as a wall.
You’re one splash away from finishing the coffee task in House of Hazards when a slice of toast rockets out of the toaster and flattens you on the kitchen tile, right as your opponent slips past toward the mailbox. That’s the game in one moment: chores turned into a demolition derby, four players sprinting through the same rooms while sabotaging each other.
The Chore List: Coffee, Teeth, Watering Can, and Mail
Every round hands out the same short list of jobs: coffee in the kitchen, teeth in the bathroom, the garden watered, and mail carried in from the mailbox. None of these tasks are hard alone; the difficulty comes from three other people racing the same rooms to slow you down.
Finishing fastest wins the round, but the game cares less about how you finished than how far ahead you were. That gap matters once the punishment wheel gets involved.
New players tend to treat the chore list as the whole game and ignore everything around them. That’s how a comfortable lead disappears in the final seconds.
Reading Hazards Before They Read You
The house fights back on its own. Light fittings drop without warning, taps misfire and spray water, laser beams sweep through rooms in a pattern you have to sidestep, and toast launches out of the toaster hard enough to knock you flat. The ceiling pipe is the one most beginners miss: it can drop at any moment, and the only way through is to crawl under it rather than outrun it.
Players who treat the environment as background noise lose seconds to hazards they’ve already seen a dozen times. Players who time their runs around the laser sweep and toaster’s rhythm stop getting caught by surprises that were never random.
That learning curve is most of the early difficulty here, since the hazards rarely change, only how well you’ve learned to read them. Once the pipe has caught you once, you don’t forget to crawl a second time.
Sabotage Tools: Locking Rivals in the Chest
Beyond the ambient hazards, you get direct ways to mess with whoever’s ahead: fire taps, toast, or lasers at an opponent, drop a light fixture on their head, or grab their limp body and lock them inside a chest for several seconds.
The chest grab is the move most beginners forget exists until someone uses it on them. It turns a hazard that merely slows a rival down into one that removes them outright.
Players who do best split attention between chores and where everyone else stands. Some lean almost entirely into sabotage instead, camping near a hazard switch.
The Punishment Wheel in House of Hazards Targets the Leader
After each round, a scoreboard shows how much of the chore list everyone finished, then a lucky wheel spins to decide who gets punished next. The wedges aren’t equal size: the more you completed, the bigger your slice, meaning whoever dominated the previous round is statistically most likely to get hit.
A second wheel with six wedges decides the exact punishment:
- Safe Zone, meaning nothing happens to you
- Redo Last Task, repeating the chore you just finished
- Heavy Weight, wearing armor that slows your speed
- Friendly Friend, leaving opponents a flower instead of grabbing them
- Nonstop Dab, increasing hazard frequency
- Inverted Control, reversing your movement inputs
Landing on Inverted Control while the pipe is already dropping constantly is when most players start swearing at their monitor. It’s the wedge nobody wants to spin.
Time Trial and Multiplayer Mode
House of Hazards runs two modes. Time Trial strips out the other players and sabotage entirely, leaving you to run the chore list solo against the clock.
Standard multiplayer is the one everyone plays for, pitting up to four people against each other with sabotage fully switched on.
Skipping Time Trial isn’t fatal, but a few solo laps make the laser sweep and toaster timing predictable instead of surprising once real opponents join.
Cast and Controls for Up to Four Players in House of Hazards
You start with four characters: Dom, Marissa, Jerry, and Samantha. Beyond them sit four unlockables, Robo Rob, Buster, Rocking Grandma, and Super Sam, cosmetic rather than mechanically different.
Player one moves on A and D, jumps with W, and crouches or grabs with S, while player two mirrors that on J, L, I, and K. A third and fourth player join on gamepads.
Lag is a recurring complaint once four people and a room full of hazards render at once. Closing other tabs and running fullscreen are the fixes players recommend.
Questions Players Ask About House of Hazards
How many people can play House of Hazards at once?
Up to four, locally on the same device: two on keyboard, one on A/D/W/S and one on J/L/I/K, plus two more on gamepads, or one player against three AI opponents.
What do you actually have to do each round?
Four chores: drink coffee in the kitchen, brush your teeth in the bathroom, water the garden, and fetch the mail from the mailbox before bringing it back inside. You do this while dodging hazards and rivals trying to sabotage you.
Why do I keep getting punished even when I’m winning?
The lucky wheel weights its wedges by how much of the chore list you completed. A strong round means a bigger slice of the wheel and a higher chance of landing a punishment like Inverted Control next round.
House of Hazards turns four simple chores into a genuinely tense scramble the moment the toaster starts firing and the punishment wheel starts deciding who runs their next lap in heavy armor. It rewards players who read the ceiling pipe and the laser sweep as a pattern rather than a surprise, and it punishes the leader just often enough to keep every round from being a foregone conclusion.
A Little to the Left hands you a messy drawer, a crooked stack of books, or a shelf of mismatched jars, and the entire game is just nudging things into place — except a cat keeps wandering through and undoing exactly what you just finished.
Sorting and Stacking in A Little to the Left
Each puzzle in A Little to the Left drops the player into a small, cluttered scene and asks for nothing more complicated than dragging objects into an arrangement that feels right — books by color, jars by height, cutlery back into a drawer. The catch is that “feels right” often has more than one valid answer, and the game accepts several different tidy arrangements rather than locking every puzzle to one exact solution.
The mischievous cat woven through the game isn’t just flavor text. It actively wanders into scenes and disrupts what’s already been organized, turning a few puzzles into a small loop of tidy, get interrupted, and tidy again rather than a single clean pass.
New players sometimes rush toward the first arrangement that looks plausible and miss that the game rewards noticing smaller details — a label facing the wrong way, an object one size out of sequence — before it accepts the solution as finished.
Over One Hundred Puzzles Plus a Daily Delivery
The base game ships with more than one hundred unique puzzles, each built around its own small domestic scene rather than reusing the same objects with new skins. On top of that, the Daily Tidy Delivery generates a new puzzle every day, giving players a reason to come back even after the main puzzle set is finished.
An expansion called Cupboards and Drawers added a further set of puzzles built around the same organizing logic, extending the household spaces the game pulls scenes from beyond what shipped at launch.
Does A Little to the Left have more than one correct answer per puzzle?
Many puzzles do accept multiple valid arrangements rather than a single fixed solution, which is part of why the game feels forgiving compared to a stricter logic puzzle.
What is the Daily Tidy Delivery?
A new puzzle generated once per day, separate from the over one hundred puzzles in the main game, giving players a reason to return after finishing the core content.
A Little to the Left works because tidying a drawer or straightening a stack of books is satisfying on its own, and the cat that keeps wandering back through to mess with your work is the one part of the game that refuses to stay tidy no matter how carefully you’ve arranged everything else.
Have You Seen This Cat? asks a question that sounds sweet until the second kitten in the room turns out to be the one thing in the house that’s actually hunting you.
Telling a Real Cat From a Copycat in Have You Seen This Cat?
The core of Have You Seen This Cat? is a spot-the-difference problem dressed up as a survival horror game: a kitten wanders through darkened rooms and hallways, and somewhere nearby is an imposter built to look almost exactly like it. Figuring out which one is real, before committing to picking one up or approaching it, is the entire tension of the game.
The imposter isn’t passive once it’s noticed you. It can mimic a real kitten convincingly enough to get close, and once the deception fails, it gives chase through the same low-poly rooms and passageways the rest of the game takes place in.
New players tend to trust the first cat they see rather than checking a room fully first, which is exactly the instinct the game is built to punish.
PS1-Era Style Meets a Genuinely Tense Chase
The presentation leans into a deliberately dated look — chunky, low-poly models and lighting straight out of the PS1 survival horror era — which does double duty by making the copycat’s mimicry harder to catch on sight. Sharp modern lighting would give away too much; the grainy, low-poly style keeps the player squinting at details the same way the character in the game effectively has to.
Once the copycat is provoked into chasing, the low-poly halls that felt merely atmospheric a moment earlier become genuinely disorienting, since familiar layouts look different at a sprint than they did while cautiously checking a room.
How do you tell the difference between a real cat and a copycat in Have You Seen This Cat?
By checking details closely rather than approaching on sight — the game is built around spot-the-difference observation before any chase sequence begins, and rushing an interaction is the fastest way to guess wrong.
What happens if you get caught by the copycat?
The imposter gives chase through the game’s dark, low-poly rooms and passageways once it’s been provoked, turning what was a quiet observation puzzle into a survival horror chase sequence.
Have You Seen This Cat? gets its tension from a genuinely simple idea executed well — a kitten is either real or it isn’t, and the low-poly rooms give just enough detail to make that call correctly if you actually stop to look before the copycat decides to stop pretending.
Character select in Rowdy Wrestling does not work the way it does in most fighting games. Every one of the 55 wrestlers shares the exact same moveset, and the only thing that changes between them is size, stamina, and speed. Pick the biggest wrestler on the roster and you’re not getting new moves, just a slower character who hits harder and survives longer.
Every Wrestler in Rowdy Wrestling Shares One Moveset
Once that clicks, picking a character stops being about a fighting style and starts being about a body type that suits how you play. A small, fast wrestler gets in and out of range quickly but folds under one good hit; a bulky one hits harder but struggles to close distance on someone who keeps circling.
New players usually pick a character based on how funny it looks rather than its size or speed. That matters less in a casual match than against someone who picked deliberately.
Rumble, Solo Career, and Tag Team
Rumble mode is the classic version: an all-against-all brawl with multiple wrestlers in the ring at once, and the goal is to be the last one standing. Solo Career sends you through a string of fights toward a title. Tag Team pairs you up so you can bait an opponent toward your partner instead of handling everything alone.
Rumble is where most of the chaos people associate with the game happens. More bodies in the ring means more chances for a stray dropkick to send the wrong person flying.
Punches, Dropkicks, Suplexes, and Steel Chairs
The core toolkit is small but ragdoll physics make it feel much bigger. A punch and kick cover basic offense, while a dropkick thrown while jumping covers gap-closing and knockback in one move. Once an opponent is stunned, a grab sets up a body slam or a suplex, either of which can send them flying clear of the ring. A steel chair spawns randomly and turns an even fight decisive if you reach it first.
Beginners throw dropkicks constantly because they feel powerful. A whiffed one leaves you flat on the mat long enough to eat a grab and a suplex in return.
Ragdoll Physics Make Rowdy Wrestling Unpredictable
None of these moves behave with clean, reliable outcomes, because ragdoll physics add chaos to every hit. A suplex that should send an opponent a short distance can instead send them cartwheeling out over the ropes. It’s the most divisive part of Rowdy Wrestling: the same unpredictability behind a lucky comeback also lets a well-earned advantage evaporate from one weird bounce.
Players who lean into that chaos, going for chair shots and suplexes near the ropes on purpose, tend to come out ahead. Playing it safe in the center of the ring rarely pays off the same way.
Browser Solo Play vs Local Two-Player
The browser version of Rowdy Wrestling matches you against computer-controlled opponents rather than a live second player, which surprises people expecting a friend on the same keyboard. The local two-player mode belongs to the mobile version instead.
How many wrestlers are in Rowdy Wrestling?
There are 55 characters to choose from, and all of them use the same moveset, differing only in size, stamina, and speed rather than unique moves.
Does picking a different character change your moves in Rowdy Wrestling?
No. Punches, kicks, dropkicks, grabs, body slams, and suplexes work identically no matter who you pick; the only thing that changes is how big, fast, or durable that wrestler is.
Can you play Rowdy Wrestling against a friend?
In the browser version you’re matched against computer opponents. Local two-player on one device is available in the mobile version.
Rowdy Wrestling stays fun because the ragdoll physics refuse to behave, turning a clean suplex near the ropes into either a match-winning toss or a wild bounce nobody saw coming, and that gap is why Rumble mode keeps people coming back.
In Duo Survival 3 you start with two survivors, one built around fire and one around water, dropped at the edge of an overrun level with nothing but a kick and a thrown bottle between them and the horde behind. Whatever happens next depends on whether the two of you move together or apart.
One survivor is stronger and sturdier, able to push heavier objects and take a hit without going down, while the other is quicker and more agile, built for tight gaps and fast platforming. Beginners treat the two characters as interchangeable and send whichever one is closer to a switch, only to find the level needed the strong survivor holding a weight plate while the agile one slipped through a gap that closes back up seconds later. It’s a mistake players remember, which might explain the game’s more than 530,000 player votes across the portals hosting it.
Fire and Water Balance Duo Survival 3 Builds Every Puzzle Around
The fire-and-water split decides which hazards each survivor can walk through safely and which end a run instantly. Rooms are built so a hazard blocking one survivor is harmless to the other, so the puzzle is almost always about routing, not combat.
By the time a level pairs a weight plate with a gated path, hesitating over which survivor goes first costs you the run, since the zombie horde is on a timer rather than waiting in one fixed spot.
Players who lean on the kick-and-throw-bottle action purely for combat miss its other use, since a thrown bottle can also trigger a distant switch or knock loose an object neither survivor could reach.
Kicking, Throwing, and the Contraptions Duo Survival 3 Hides in Plain Sight
Movement uses A and D or the arrow keys, jumping is W or the up arrow, and S or the down arrow handles the kick-or-throw action, changing depending on what the survivor is standing near. Crawling through hidden rooms tucked behind ordinary-looking walls is where the game’s better contraptions hide, and completionists who backtrack usually find a shortcut that trivializes a later puzzle.
Solo players toggle between the fire and water survivor at will, which works but demands planning a sequence in advance rather than reacting the way two people sharing a keyboard naturally do.
Mechanisms that show up repeatedly include:
- Weight plates that stay active only while a survivor stands on them
- Gated paths that open once both survivors reach separate triggers
- Breakable barriers cleared with a thrown bottle or a well-timed kick
- Can you play Duo Survival 3 alone? Yes, solo players switch control between the fire and water survivor as needed, though every weight-plate puzzle has to be planned out since nobody is holding the second position for you.
- What is the objective in Duo Survival 3? The two survivors are working to find a cure and reach safety, which in practice means clearing each level’s puzzle sequence before the zombie horde catches up.
- What do the fire and water survivors actually do differently? One is stronger and can push heavy objects or shrug off hits, while the other is quicker and better suited to tight platforming, and most rooms only let one of them survive a given hazard.
Duo Survival 3 keeps its two survivors leaning on each other from the first weight plate to the last gated door, and once the kick-and-throw-bottle trick clicks as more than just crowd control, the fire-and-water routing puzzles stop feeling like an obstacle and start feeling like the actual game.
What happens when the rule book changes overnight and you’ve already stamped three people through under yesterday’s regulations? That’s the entire tension of Papers, Please: an inspector’s booth at the border of the fictional country of Arstotzka, a stack of documents that keep gaining new fields to check, and a family at home who eats or doesn’t depending on how many people you process correctly today.
The Booth at Grestin: Papers, Please’s Core Loop
Every day plays out the same basic way: an applicant steps up to the checkpoint, hands over whatever documents they’re carrying, and the player has to decide whether everything lines up with the current day’s rule set before stamping APPROVED or DENIED. Early days only require checking a passport against a name and photo. Within a week that grows into cross-referencing entry permits, work passes, and ID cards against each other, checking expiration dates, and comparing a physical description against the person actually standing at the window.
Each correct decision earns a small amount of money, and each mistake — approving someone who should have been denied, or the reverse — costs a citation, with repeated citations cutting into pay for the day. That pay is the only thing standing between the inspector’s family and rent, food, and heat, so a slow, careful shift and a fast, sloppy one both carry real consequences by evening.
New inspectors tend to under-check early on, missing a mismatched issue city or an expired seal because the rule book hadn’t flagged it as new that day. The game rarely tells you outright what changed; noticing the difference yourself is most of the actual skill.
Documents, Tools, and What Actually Gets Checked
The inspection toolkit grows steadily across the game: a rule book that updates daily, a fingerprint scanner for cross-checking identity, a sequence scanner for weapons and contraband, a height scale mounted in the booth, and eventually a full body scanner. Each new tool adds another possible mismatch to catch, and by the later days a single applicant can require five or six separate checks before a stamp is justified either way.
Some applicants aren’t simple pass/fail cases at all. A recurring smuggler named Jorji Costava shows up repeatedly with increasingly bad forged documents, and how the player handles him — turn him away, report him, or wave him through — is one of the small threads that carries across multiple days rather than resetting each morning.
The EZIC organization contacts the inspector partway through the game, offering money in exchange for looking the other way on specific people or smuggling items through the checkpoint. Taking that offer or refusing it is one of the clearest forks in a game built almost entirely out of quieter, document-level decisions.
Twenty Endings and a Family That Doesn’t Reset
The family depending on the inspector’s income isn’t just a framing device sitting outside the gameplay. Their needs — rent, food, medicine, heat — actually change month to month, and running out of money for any of them has direct consequences that carry into the following days rather than just a game-over screen.
Papers, Please has roughly twenty different endings depending on choices made across the full run, most of them tied to how the player handled EZIC, the family’s situation, and a handful of specific applicants whose stories extend beyond a single booth interaction.
How many endings does Papers, Please have?
Around twenty, shaped by decisions made throughout the game — particularly involvement with EZIC and how specific recurring characters like Jorji Costava are handled.
What happens if you approve the wrong person in Papers, Please?
A mismatched document results in a citation. Citations stack over the course of a shift, and enough of them reduce the day’s pay, which puts direct pressure on rent, food, and heat for the inspector’s family.
Does the rule book change every day?
Yes — new fields, new document types, and new cross-checks get introduced regularly, and the game rarely announces exactly what’s different, so re-reading the current day’s rules carefully is necessary rather than optional.
Papers, Please turns a job most games wouldn’t bother simulating into its entire structure, and by the time Jorji Costava is back at the window with yet another badly forged passport, checking every seal and expiration date against a rule book that changed since yesterday feels less like paperwork and more like the whole point.
Soccer Random looks like a simple, cartoonish take on two-a-side soccer, but it plays like a constant negotiation with your own goalkeeper, who obeys the exact same key you just used to send your striker forward. Press W or the up arrow and both of your players jump at once — there’s no way to move just one.
One Key, Two Players, and the Own-Goal Problem in Soccer Random
Each team fields two players who move together: one usually pushes forward as the attacker, the other sits back near the net as the goalkeeper. A single input controls both, which sounds simple until the ball drifts toward your own goal at the exact moment you press the key to clear it — and your keeper’s jump knocks it straight in instead.
New players fight this by mashing the button near their own net, hoping a jump connects with the ball before it crosses the line. It rarely works better than a single well-timed press, and it’s the fastest way to score on yourself twice in one match.
Holding the key down keeps a player airborne longer instead of triggering an instant hop, which matters more than it looks like it should when a ball is hanging just out of normal jump range.
Balls, Uniforms, and Fields That Reset After Every Soccer Random Goal
Score, and the match doesn’t just continue — it resets around you. The field can flip from a sunlit park to a nighttime pitch or a snowy field between goals, uniforms swap between kits, swimwear, and underwear, and even the ball changes: a normal soccer ball one goal, an American football or a beach ball the next, each bouncing differently off a head or a boot.
A match is a race to five goals, and whichever side gets there first wins the game outright, with no separate halves or clock to run down. Players who’ve put in real time develop a few habits that carry across all the randomness:
- Keeping the goalkeeper slightly back rather than jumping every time the striker does
- Treating an oddly-shaped ball, like the football or tennis ball, as a reason to slow down rather than react on instinct
- Watching where the ball is heading rather than which teammate is closer to it, since both jump on the same press regardless
None of that erases the chaos that makes Soccer Random what it is. Plenty of matches are decided by an own goal, and players tend to treat that as one of the funniest parts of a match rather than a flaw worth complaining about.
What happens when a single button has to carry you through an axe duel, a tank fight, and a round of thumb wrestling inside the same few minutes? That’s the whole pitch behind 12 Mini Battles: one control scheme, dozens of wildly different contests, and barely enough time between them to figure out what just happened before the next one starts.
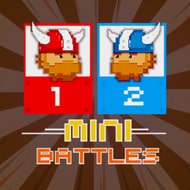
12 Mini Battles Runs on One Shared Button
Every mini-battle in the game, from Duel and Hand Slap Duel to Frog Tongue Frenzy and Boxing Brawl, runs on the same one-button input for each player. That sounds limiting until you sit down with someone and realize the challenge was never about button count, it’s about figuring out what a single press does differently in a soccer match versus a tank fight versus a round of golf. Some battles reward mashing as fast as possible, others punish anyone who doesn’t wait for the right moment to press.
Beginners tend to spam the button on every mini-battle out of habit, which works fine in something like Thumb Wrestling and gets them destroyed in something like Hole-in-One Challenge, where timing one press matters far more than speed.
The 36 mini-battles span a few recognizable categories:
- Sports contests like Tennis Rally, Basketball Battle, and Soccer Random
- Reaction duels like Axe Battle, Mace Battle, and the original Duel
- Vehicle fights like Tanks and Firefighter Helicopter
- Physics chaos like Wrestling, Board Breaker, and Lava Leap
No Real Solo Mode in 12 Mini Battles
The game is built for two people on one keyboard, player one on the A key and player two on the L key, nothing more. There’s no controller to configure and no menu to dig through before a round starts, which is exactly why it works as a quick couch game rather than something you sit down to seriously practice.
What catches people off guard is that there’s no real single-player mode against a computer opponent. If nobody’s around to play, you’re expected to control both sides yourself, tapping A and L in turn. It works as a way to learn every mini-battle’s timing, but it’s also one of the few things players genuinely complain about.
Cycling Through the Mini-Battles
A session moves fast because the game never lingers on a single contest. A handful of the battles you’ll run into over a normal run:
- Duel, a straight reaction-time face-off
- Wrestling, ragdoll physics with no clean counterplay
- Tanks, where positioning matters more than reflexes
- Rescue Mission, a scramble against the clock
- Golf, where a single mistimed press overshoots everything
Once Wrestling or Board Breaker rolls around, a round stops being about reflexes and starts being about who exploits the physics engine’s quirks first, which is a different skill entirely from the reaction-time duels earlier in a session.
Reflex Duels vs Physics Chaos
Players who only trained on Duel-style reaction battles often stall out the moment a physics-based mini-battle shows up, because the same single button suddenly controls momentum instead of one clean action. Competitive players tend to specialize in a handful of battles like Boxing Brawl or Axe Battle, where a short reaction window means practice genuinely shows, while more casual players just want the chaos of not knowing whether the next round is Frog Tongue Frenzy or Martian Shooter. Losing a bad battle to a physics fluke rarely feels final when the next one starts within seconds.
12 Mini Battles never tries to be deep in any single mini-battle; the appeal is entirely in how fast it moves between Frog Tongue Frenzy, Tanks, and Scrimmage without ever giving either player time to settle into a routine.
What happens when a tenant’s face matches their ID, their apartment number matches the building record, and something is still wrong? That’s the daily bind in That’s Not My Neighbor: a doorman’s booth, a stack of tenant paperwork, and a world where doppelgangers mimic humans well enough that the documents alone aren’t always enough to catch them.
Working the Door in That’s Not My Neighbor
The job is straightforward in theory: applicants show up asking for access to the building, and the player checks their papers — ID, apartment number, arrival details — against what’s on file before deciding to let them in or turn them away. In practice, doppelgangers infiltrate that process by copying real tenants closely enough that a careless check waves them straight through.
Confirming an applicant sometimes takes more than a glance at a document. Placing a phone call to verify a tenant’s story is part of the toolkit, and skipping that step to save time is exactly how a doppelganger slips past a distracted doorman.
New players tend to focus entirely on the ID photo and miss smaller inconsistencies elsewhere in the paperwork — a detail that doesn’t match the building’s own tenant records is often the only tell a doppelganger leaves behind.
Arcade Mode and the Six Modes That Followed It
That’s Not My Neighbor launched with a single game mode, Arcade Mode, built around that same core loop of checking documents against tenants at the door. The game has since grown to six completed modes, each changing the pressure or structure around that same central verification task rather than replacing it.
The core tension stays consistent across modes: doppelgangers aren’t identified by one obvious flaw, they’re caught by cross-referencing several small details that individually look almost fine.
How do you tell a doppelganger apart from a real tenant?
By cross-referencing details across their documents, apartment records, and sometimes a phone call — doppelgangers tend to get one small detail wrong rather than failing every check at once.
How many modes does That’s Not My Neighbor have?
Six completed modes as of the game’s more recent updates, all built around the same document-checking core that Arcade Mode introduced at launch.
That’s Not My Neighbor earns its tension from how ordinary the job looks on paper — checking IDs and apartment numbers — right up until a doppelganger passes every obvious test and only a phone call or a mismatched record gives them away.
In Boxing Random you start with one button and zero control over your fighter’s arms, legs, or balance, which matters more than it looks. Player one punches with W, player two with the up arrow — one input is the whole moveset the game gives you. Whether the arm swings clean or your boxer stumbles into the ropes is handled by ragdoll physics that don’t care what you intended.
The One Button Behind Boxing Random
New players almost always make the same mistake: they mash the punch key hoping volume beats timing. It doesn’t — a boxer off balance is wide open, and opponents who wait a half-second land the clean head shot that scores, since body hits only push a fighter back.
Matches run as a race to five knockouts, and there’s no round timer pressuring rash swings, so patience costs nothing.
The two-player mode has both fighters sharing one keyboard, which turns matches into close-range chaos — you can see an opponent’s hand twitch toward the key before they commit.
Pocket Pouch Rounds and Shifting Arenas in Boxing Random
Every knockout resets more than the score. The ring changes too — one match drops fighters into business suits, another buries the arena in snow, and a beach round adds sharks in the background. None of it is cosmetic; slicker footing changes how safe a swing is.
The randomness that defines the series shows up sharply in pocket pouch rounds, where a knockout punch can land anywhere on the body instead of just the face. Players trained to aim high get caught out the first time one appears, and advanced players lean on habits picked up over many matches:
- Letting the opponent throw first in neutral rounds, since a missed swing leaves them stumbling for a beat
- Staying close to center stage on icy or unstable arenas rather than drifting toward the edges
- Watching stance rather than the swing — most ragdoll fighters wobble right before they punch
None of that removes the jank. Boxers still faceplant off clean hits, and punches sail through solid-looking contact — what players call a coinflip round, where a sure swing turns into a shared joke instead of a point.
Boxing Random rewards players who stop fighting the physics and start reading their opponent’s next twitch instead of their own last punch. Five knockouts decide the winner, but whether you get there patient or button-mashing into a pocket pouch surprise changes every match.
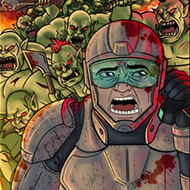
You spend the Build phase in Sir, We Have an Orc Problem stacking chokepoints and walls across a map, certain the layout will hold — and then the Battle phase starts, tens of thousands of orcs pour in at once, and it becomes obvious how much of that plan was optimistic.
Build and Battle: The Two Phases of Sir, We Have an Orc Problem
Every stage runs through two distinct halves. The Build phase hands players a map and lets them construct strongholds and chokepoints meant to trap, block, and funnel incoming enemies into manageable lines. The Battle phase then switches the player into active management of the fight itself, deploying additional firepower — including bombs and nukes — to finish off whatever the fortifications alone can’t handle.
What makes the Battle phase distinct from a typical tower defense wave is scale: a single battle can spawn tens of thousands of enemies at once, closer in spectacle to a massive battle scene than a handful of creeps trickling down a lane.
New players tend to over-invest in Build phase defenses and then coast passively through Battle, missing that active management — timing bombs and nukes rather than just watching the fortifications work — is where most of the late-game difficulty actually gets handled.
Incremental Progression Across Runs
Sir, We Have an Orc Problem layers incremental-style meta-progression on top of each individual stage, meaning strength carried between runs matters as much as any single Build phase layout. A weak fortification on a fresh run can still succeed if enough meta-progression has accumulated behind it, and a strong layout can still fall short early on without that backing.
That progression structure is part of what’s kept players returning stage after stage — the tower-defense fundamentals stay consistent, but the numbers behind them keep shifting run to run.
How many enemies can appear in a single Sir, We Have an Orc Problem battle?
Tens of thousands at once in a single stage’s Battle phase, which is what gives fights their massive-battle scale rather than a typical trickle of enemies.
What’s the difference between the Build and Battle phases?
Build phase is about constructing strongholds and chokepoints ahead of time; Battle phase is active management of the fight itself, including deploying bombs and nukes once the wave is underway.
Sir, We Have an Orc Problem earns its scale honestly — a fortification that looks airtight during the Build phase gets tested for real once tens of thousands of orcs show up during Battle, and the incremental progression behind each run is what makes the next attempt feel different from the last.
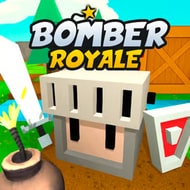
You shove a lit bomb across the floor of Cross Road, watch it skid into a stack of crates, and duck around the corner half a second before the blast levels the block. That is the whole rhythm of Bomber Royale: drop it, push it, and hope your timing beats theirs.
Press spacebar to drop a bomb, then click to shove it toward an opponent before the fuse runs out. Beginners usually plant a bomb and retreat instead of pushing it, wasting the one move that actually pressures another player. Every match starts you off with only the Rubber Bomb and the Climbing Claw.
Reading Cross Road, Train Station, and the Rest of the Bomber Royale Arenas
The bombing game rotates through named arenas. Cross Road and Road favor players who bait an opponent into open lanes before pushing a bomb their way, while Train Station and Maze reward patience, since tight corridors turn a wrongly timed push into a bomb rolling back at you.
Early rounds are forgiving because destructible cover is everywhere; by the time a match on Maze reaches its final stretch, the corridors are stripped bare and every push is visible end to end.
The advanced habit most players miss is pushing a bomb around a corner, using the wall itself to redirect the blast. Mistiming it against a wall is a fast way to catch your own blast instead.
Power-Ups, Skins, and What Bomber Royale Rewards Over Time
Smashing crates is how you find power-ups that extend blast range, speed up your bomb, or let you carry more bombs at once. Stacking these mid-match usually separates a player who survives to the final one or two standing from one who gets caught reloading.
In-game cash earned from matches unlocks new skins, cosmetic only but still a point of pride among regulars who grind Cross Road for one. Single-player mode lets you practice pushes against AI first.
Power-ups worth prioritizing include:
- Extended blast range
- Faster bomb speed for quicker pushes
- Extra bomb capacity
What is the difference between the Rubber Bomb and other bombs in Bomber Royale?
The Rubber Bomb is the starting bomb every match begins with, alongside the Climbing Claw, and it behaves predictably enough to learn pushing on before relying on crate power-ups.
Can you play Bomber Royale without other players?
Yes, single-player mode pits you against AI in the same arenas used for multiplayer, a reasonable place to practice before facing real players.
How do you unlock new skins in Bomber Royale?
Skins are unlocked using in-game cash earned by playing matches, and while they don’t change how a bomb behaves, they mark how many rounds a player has put in.
Bomber Royale rewards the same instinct every match: read the crates, time the push, and never stand next to your own Rubber Bomb a second longer than you have to. Once you’ve burned through enough rounds on Train Station and Maze to stop flinching at a bomb rolling toward your feet, the arena rotation starts feeling like puzzles you already know the answer to.
You send Dummy Danny sprinting toward the edge of a collapsing platform, mistime the jump, and watch his limbs go completely loose mid-air before he crumples against a wall. That flop is the whole point. Fun with Ragdolls Plus builds its identity around exactly that kind of moment, mixing a physics-driven platformer with a story campaign and a sandbox that lets you cause the same chaos on your own terms.
| Genre | Physics platformer / sandbox |
| Platforms | PC, mobile |
| Core Modes | Story Mode, Sandbox Mode |
| Main Characters | Dummy Danny, Rickie Ragdoll |
Dummy Danny and the Story Mode Premise
Story Mode centers on Dummy Danny and his friend Rickie Ragdoll, two competitors forced into a series of mini-games under the promise that winning earns them freedom. It sounds simple in the opening minutes, but the game keeps peeling back layers until the “freedom” on offer looks a lot less generous than advertised. Danny starts optimistic and eager to help Rickie, which sets up most of the emotional weight once their goals stop lining up.
The friendship between Danny and Rickie is the actual engine of the campaign, not the obstacle courses themselves. Rickie’s obsession with climbing a competitive scoreboard pushes him toward choices that strain the partnership, and players who care about narrative pacing tend to bring this up in discussion threads more than the platforming itself. The betrayal beat lands harder because the early chapters spend real time letting the two ragdolls just goof around together.
By the time Danny starts questioning what winning actually means, the game has already trained you to expect physics comedy over sincerity, so the tonal shift catches a lot of first-time players off guard. That contrast between slapstick ragdoll movement and a genuinely darker narrative thread is one of the things players bring up most when describing what makes the campaign memorable.
Combat and Movement in Fun with Ragdolls Plus
Combat stays intentionally light: punching, throwing bombs, and shooting cover most encounters, and none of it is trying to be a deep fighting system. What sells it is the ragdoll physics underneath every hit, since a punch that lands slightly off-angle can send an opponent spinning across a platform instead of just stumbling back. Early on, players mostly get this wrong by treating fights like a normal platformer and forgetting momentum carries between hits.
Movement uses the same physics logic. Jumps, climbs, and ledge grabs all interact with the ragdoll’s loose-limbed body, which is why timing matters more here than in a typical platformer. A dedicated ragdoll toggle lets you flop your character on command, and while it exists mostly for chaos, speedrunning-minded players have started experimenting with it as a way to slide under obstacles faster than a normal jump allows.
- Punching for close-range crowd clearing
- Thrown bombs for gaps and grouped enemies
- Shooting for distance encounters
- Manual ragdoll flopping for movement tricks
As the campaign progresses, obstacle courses stack hazards on top of each other instead of introducing new mechanics, so difficulty comes from combining familiar tools under tighter timing rather than learning something entirely new.
Collecting Gears Across the Campaign
Gears are scattered through the levels as the main collectible, and grabbing them becomes a habit long before the game explains why. Completionist players chase every Gear on a first playthrough anyway, since exploring the edges of a level often reveals shortcuts that help later on replays. Once you reach one of the later obstacle gauntlets, having already learned the layout from Gear hunting pays off in a very concrete way.
The lack of a hard unlock tied to Gears is one of the more debated points in the community. Some players see it as a missed opportunity, arguing the collectible needed a cosmetic or gameplay payoff. Others treat it as a low-pressure side activity that doesn’t distract from the story, which keeps the pacing tighter than a typical collectathon.
Sandbox Mode Tools and the Merge Crate
Sandbox Mode is where Fun with Ragdolls Plus turns from a guided campaign into an open toybox. Recent updates added a Laser Emitter, Laser Receiver, and Laser Reflector, which together let builders route beams around a level instead of firing them in a straight line only. Combined with Cannons that now support Auto Aim and Cannon Auto Fire, builders can wire up automated hazard courses that trigger without anyone standing there to press a button.
The Merge Crate is one of the newer sandbox pieces players talk about, letting you combine placed objects into single interactive setups instead of stacking loose parts by hand. Builders who spend hours in Sandbox Mode tend to treat it as a puzzle design tool first and a chaos generator second, even though most casual players just want to watch a Ragdoll Cannon launch Danny across the map.
World sharing means you’re never stuck designing everything from scratch. Browsing community builds is often the fastest way to see what the newer sandbox items are actually capable of before attempting your own.
What Players Debate About Fun with Ragdolls Plus
The most common criticism centers on Gears feeling underused, but a close second is the shift away from the first game’s heavier sandbox focus. Fun with Ragdolls Plus leans harder into story than its predecessor, and longtime fans of pure sandbox building sometimes feel the campaign takes up space that used to belong to freeform creation. Newer players who came in for Dummy Danny’s story tend not to notice this trade-off at all.
What happens when you accidentally trigger the ragdoll button mid-jump?
Danny goes fully limp and drops out of his current momentum, which usually means falling short of a platform or landing awkwardly. It is a real risk during precision platforming sections, since the ragdoll toggle shares space with other inputs and gets pressed by accident more often than players expect.
Does collecting every Gear unlock anything in Fun with Ragdolls Plus?
No hidden reward is tied to full Gear completion right now. They function purely as an exploration incentive, encouraging players to look past the obvious path through each level rather than gating cosmetics or extra content behind a full set.
Is the Sandbox Mode in Fun with Ragdolls Plus different from the first game?
Yes. Building blocks are simpler and more accessible, and newer additions like the Laser Emitter, Laser Receiver, Laser Reflector, and Merge Crate give builders tools the original sandbox never had, even though the overall focus of the sequel has shifted toward Story Mode.
Fun with Ragdolls Plus works because it never lets its darker story swallow the physics comedy that made the concept fun in the first place, and by the time Rickie’s choices catch up with him, the Gears you picked up along the way feel less like a checklist and more like a record of the path Danny took to get there.
You step onto a floor that looks perfectly solid, and it disappears out from under you before your foot finishes landing. That is the premise of Level Devil in one moment: nothing on screen can be trusted just because it looks normal, and the game teaches that lesson by killing you with it at least once per stage.
Every Stage Teaches One Lie
Level Devil is built stage by stage, and each stage is designed around a single trap mechanic rather than throwing everything at once. One level might be about a floor panel that only vanishes after you step on it a second time, the next about a spike that waits until you are mid-air. Learning to isolate what this particular stage is lying about is most of the actual skill involved.
Beginners tend to make the same mistake regardless of which trap is in play: they trust the starting layout. A platform that looks safe in the opening frame is exactly the one Level Devil is likely to pull away, drop spikes onto, or turn into a launch spring the moment weight lands on it.
Instant respawn keeps the punishment from costing real time. There is no loading screen and no walk back to where you died, so a stage that kills you repeatedly still moves at a pace closer to trial and error than frustration, once the pattern clicks.
From Level Devil to the Demon King’s Area
The game is split into difficulty phases rather than one flat run of 200 stages. The earliest stages, simply labeled Level Devil, cover the basics: pits, spikes, and platforms that behave more or less how they look. Level Devil-er raises the stakes across sixteen doors of harder variations, and Level Devil-est is where the rules stop applying, since stages there can shrink you, grow you, teleport you mid-jump, or turn the exit door itself into part of the trap.
Past all three phases sits the Demon King’s Area, described as the hardest stretch in the game and reserved for players who have already learned to distrust every visual cue it gives them.
The jump in difficulty between phases is not gradual: a player who breezes through the first doors can hit Level Devil-er and immediately start losing lives to a control-reversal trap that swaps left and right without warning, sometimes switching back before the stage ends.
Sixteen Doors, Sixteen Ways to Fail
Each of the sixteen doors is themed around one category of trap:
- Pits and disappearing floors that drop without warning
- Spikes, both fixed in place and moving mid-air
- Saw blades and other rotating hazards
- Warp portals that teleport you into a different, often worse position
- Gravity reversals that turn the floor into the ceiling
- Screen-edge wraparounds that carry you off one side and back in on the other
None of these traps stay hidden forever. The game telegraphs almost everything at least once, usually right before it kills you the first time, the closest thing Level Devil offers to fair warning.
Instant Respawn Keeps Level Devil Moving
The core game spun off a mode called Trap Path, arranged as a tighter gauntlet toward a single door. Traps there activate when the player gets close rather than on a timer, punishing hesitation almost as much as recklessness.
Players who treat Level Devil as a troll platformer, a genre built around intentionally unfair, joke-like obstacles, get further faster than players expecting a straightforward jump-and-run. That same design also divides opinion: memorizing a stage through repeated deaths can feel less like skill and more like rote recall once you’ve died to the same disguised spike a fifth time, and not every player finds that satisfying.
Two hundred stages across those sixteen doors add up to a game that never stops testing the same nerve: whether you will trust what a platform, a door, or a floor looks like before Level Devil has earned that trust. It usually hasn’t.
Uncanny Cat Golf looks like a mini golf game about hitting a cat toward a hole, and mechanically that’s exactly what it is — except the ball is alive, the course is being chased by something wearing its face, and par is the least of your worries.
Hitting the Canny Cat Toward the Goal
The mechanics are pure mini golf: aim with the mouse, hit the Canny Cat, and try to reach the goal in as few strokes as possible while staying under a set par count for the hole. What separates Uncanny Cat Golf from a straightforward putting game is the Uncanny Doppelganger, an invincible minor minion that chases the Canny Cat across every course without pause.
Getting caught by the Doppelganger doesn’t just cost strokes — it triggers a jump scare and forces the current level to restart from the beginning, turning a bad shot into a full redo rather than a minor setback.
New players tend to focus purely on lining up the perfect shot and forget the Doppelganger is closing the distance the entire time a shot is being lined up, which is usually what causes an otherwise clean hole to end in a restart.
Seventy-Plus Courses and What Unlocking Prisms Gets You
The main mode spans more than seventy distinct golf courses, each built around the same core loop of outrunning the Doppelganger while still trying to putt efficiently. Collecting Canny Prisms scattered through those courses unlocks additional playable cats, extra minigames layered on top of the core golf loop, and modifiers that change how a run plays.
One of the more notable unlockable modifiers adds a parry that can no-sell the Uncanny Doppelganger outright, giving skilled players a way to neutralize the chase mechanic entirely on courses where they’ve earned it. An Arrange Mode is also unlockable, shuffling every course in the game into an endless, unpredictable order for players who’ve cleared the standard set.
What does the Uncanny Doppelganger do in Uncanny Cat Golf?
It chases the Canny Cat across every course, and catching up triggers a jump scare that forces the current level to restart rather than simply costing extra strokes.
What do Canny Prisms unlock?
Additional playable cats, extra minigames, and modifiers — including a parry ability that can no-sell the Uncanny Doppelganger once unlocked.
How many courses does Uncanny Cat Golf have?
More than seventy in the main mode, with an unlockable Arrange Mode that shuffles them into an endless, non-repeating order.
Uncanny Cat Golf works because the golf itself is genuinely solid on its own, and it’s the Uncanny Doppelganger’s constant pressure — never resting, never giving a clean shot room to breathe — that turns a relaxed round of putting into something players end up replaying just to finally out-golf the thing chasing the Canny Cat.
You mistime a jump in Volley Random, and the ball drops dead on your side while your opponent’s ragdoll windmills through what looks like a celebration. That’s the whole game in one moment: one button, and physics that don’t owe you a fair outcome.
What the Single Jump Button Actually Controls in Volley Random
Player one hits the ball with W, player two with the up arrow, and the press does two jobs — it launches your character and swings whatever limb is in the ball’s path. You aren’t aiming a spike so much as gambling on timing.
Beginners consistently jump too early, treating the button like a swing timer instead of a launch trigger. Jumping the instant the ball crosses the net usually sends it sailing past an airborne player.
Matches are short by design — the first side to five points takes the set, so a slow start rarely buries you the way it would in a longer set.
Volley Random Rounds Never Repeat the Same Court Twice
Score a point and the stage resets: new court, new ball, new physics. Some of the swings players run into most often include:
- Icy floors that send both characters sliding after landing
- Low-gravity rounds where jumps hang longer than expected
- Tall nets that punish anything but a full-height jump
- Tiny players or oversized balls that throw off spacing entirely
None of these variants are telegraphed in advance — adapting mid-match is the actual skill being tested, and serious players develop habits that hold up across variants:
- Watching the ball’s arc rather than the opponent to judge timing
- Staying near the back by default, since a late jump forward beats an early one back
- Treating the first point of a new round as a scouting swing, not a kill attempt
Does Volley Random ever feel unfair? Regularly — you cannot fully control a hit’s direction, and a correct jump can still send the ball somewhere unintended. Can one player carry a two-player team? No, both characters move on one input, so a mistimed press affects whichever is closer to the ball. Can you practice against a computer opponent? Yes, single-player mode uses CPU opponents under the same randomized rules.
Volley Random turns a five-point set into a small physics experiment every time the ball crosses the net. Players who stick with it stop expecting the last round’s timing to work on this one.
Storyteller looks like a simple comic strip with empty panels, but it plays like a puzzle where the solution is an entire relationship, betrayal, or murder, built one panel at a time out of characters who don’t do anything until you tell them to.
Building a Story to Match the Title Storyteller Gives You
Every puzzle in Storyteller starts with a stated outcome — a simple premise like two people falling in love, or someone getting revenge on an uncle — and a set of empty comic panels waiting to be filled. The player drags in characters, settings, and actions, and the story plays out logically from whatever gets placed: put a jealous character in a room with a couple and the story shifts on its own toward betrayal rather than romance.
What makes this different from a fixed logic puzzle is that Storyteller usually accepts more than one path to the same labeled outcome. Revenge on an uncle can come from a fight, a scandal, or something far stranger, and the game cares about hitting the target story beat, not which specific sequence of panels got there.
Some puzzles carry sub-objectives layered on top of the main goal, requiring the story to satisfy an extra condition alongside the headline outcome. Missing that smaller requirement while still technically completing the main story is a common way beginners get stuck without realizing why the puzzle isn’t marked solved.
Reading the Panels Like a Puzzle, Not Just a Comic
The panel-by-panel structure is what turns Storyteller into a puzzle rather than a passive reading experience. Each panel reacts to what happened in the one before it, so moving a character or swapping a setting early in a sequence can cascade into a completely different final panel than intended.
Players who treat each panel in isolation tend to get stuck longest, since the game’s logic is built on panels reading each other, not on any single panel being correct by itself.
Does every Storyteller puzzle have only one solution?
No — most puzzles accept multiple valid paths to the same stated outcome, since the goal is reaching the labeled story beat rather than matching one exact sequence of panels.
What are sub-objectives in Storyteller?
Extra conditions layered onto certain puzzles beyond the main story goal, meaning a technically complete story can still fall short of full completion if the sub-objective wasn’t also satisfied.
Does the order you place characters matter?
Yes. Each panel reacts to what happened in the previous one, so an early change can cascade and produce a very different final outcome than intended.
Storyteller keeps its puzzles feeling like actual stories instead of logic grids because every panel talks to the one before it, and once a jealous character or a badly timed setting swap sends a simple love story spiraling into something else entirely, it’s clear the game was never just about filling in blanks.
Getaway Shootout looks like a simple footrace to a marked exit but plays like a slapstick gunfight where nobody can walk, only jump, and a rocket launcher can erase your lead in one arc across the screen.
Getaway Shootout’s Jump-Only Movement Across Eight Maps
There’s no walking button in Getaway Shootout. Every bit of movement comes from jumping left or right, which sounds simple until you’re threading a narrow ledge on Launch Pad, one of the longest and most punishing maps in the rotation. New players almost always over-jump early on, landing in exactly the spot an opponent’s shotgun blast is waiting for. The eight maps, including Launch Pad, Moon, Terminal, Street, Tower, Town, and Train, each reshape that jump-based movement differently.
Time Trial strips out weapons and opponents entirely, leaving just the jump physics and all eight maps to practice on. Most people get comfortable with momentum here before taking it into a real match.
Weapons That Turn Getaway Shootout Into a Shootout
Winning a round means reaching the finish first, called a getaway, but getting there means surviving whatever’s been picked up along the way. Weapons spawn at fixed points scattered across each map, so knowing the pickup spots matters as much as knowing the exit.
- Sniper: two shots, a one-hit kill from any range
- Rocket Launcher: a single rocket with splash damage that scales the closer it lands
- Shotgun: three shells, devastating up close
- Swap Gun: one use, and it disables whatever weapon your opponent is holding
Every player starts at 100 health that’s never shown on screen, so early matches often end with someone confused about dying so fast to a sniper shot they never saw land. Players who fixate purely on reaching the exit tend to ignore pickups, while players who detour for a Rocket Launcher trade travel time for a one-hit swing in their favor.
How many people can play Getaway Shootout at once?
One Player pits you against three bots on Easy, Medium, or Hard, Two Player is local with a friend and lets you add or remove bots, and Time Trial is solo with no weapons.
Do weapons spawn in every mode?
No. Weapons only spawn in One Player and Two Player modes; Time Trial removes them so you’re only racing the map itself.
Getaway Shootout stays chaotic because reaching the exit and surviving the trip are two different problems in this game. Whether you’re memorizing Launch Pad’s ledges or gambling on a Swap Gun pickup, the getaway only counts once you’re standing on the other side.
You’ve got five minutes on the clock, a bank account you share with two other people, and a loan shark’s quota staring back at you from the top of the screen. That’s every round of Gamble With Your Friends, and the first time your friend blows the shared cash on a slot machine right before the timer runs out, you understand exactly what kind of game this is.
One Shared Bank Account in Gamble With Your Friends
The setup is simple and brutal: one to six players share a single bank account and a single, growing debt. Every “day” gives the group five minutes inside a casino tower to earn as much as possible, and everything anyone wins or loses comes out of the same pool. There’s no separating your winnings from a teammate’s bad bet — the group either hits the daily quota together or falls behind together.
New players tend to play it too safe on their first run, treating the shared bank like their own money and hesitating on bets that would actually pay off. That caution costs more than it protects, since a quota that isn’t met carries consequences into the next day.
Climbing the casino tower itself takes real coordination. Sixteen different casino games are spread across four floors, and a group that splits up to hit multiple tables at once earns faster than one that huddles around a single machine the whole round.
Tickets, Sketchy Items, and Bending the Odds
Cash isn’t the only currency in play. Completing unique challenges during a round earns Tickets, which get spent on deliberately shady items designed to tilt the odds — or occasionally sabotage a teammate as much as help them. Selling off a body part or two for a quick Ticket boost is presented completely straight-faced, which is a decent summary of the game’s tone.
Deciding whether to spend Tickets immediately or hoard them for a bigger item later becomes its own small argument within the larger argument about which table to hit next.
Proximity Voice Chat Turns Every Round Into an Argument
The mechanic that actually makes Gamble With Your Friends work is proximity voice chat. Standing near a teammate means you can hear exactly what they’re doing, hype them up mid-bet, or start blaming them in real time when a bad call drains the shared account. Move away from the group and that channel cuts out, so staying close enough to coordinate is its own tradeoff against splitting up to cover more tables.
Players who lean into the voice chat, calling out bets and near-misses as they happen, tend to have a very different experience than a quiet group clicking through machines in silence — the game is built around the shouting, not despite it.
How many players does Gamble With Your Friends need?
Between one and six, sharing one bank account and one debt regardless of group size. Smaller groups have less firepower across the four floors but also fewer people to blame when the quota gets missed.
What happens if the group doesn’t hit the daily quota in Gamble With Your Friends?
The loan shark’s demands carry forward, compounding the pressure on the next five-minute day rather than resetting cleanly.
What are Tickets used for?
Tickets are earned through unique in-round challenges and spent on sketchy items that bend the odds of the casino floor’s sixteen games, sometimes at another teammate’s expense.
Gamble With Your Friends works because the shared bank account turns every slot pull and every sketchy item purchase into a decision the whole group has to live with, and the proximity voice chat makes sure nobody can quietly blow the daily quota without everyone hearing it happen in real time.
What happens when the lights sabotage plunges the cafeteria into darkness and every crewmate scrambles to figure out who just slipped into a vent? That moment, repeated differently every match, is why Among Us stays tense after hundreds of rounds: nobody actually knows anything, they are only guessing faster than everyone else.
Crewmates finish a checklist of tasks while Impostors fake those tasks, kill when nobody is watching, and use vents to disappear before a body is found. Beginners tend to either wander alone with their task bar as their only goal, making them an easy kill, or accuse the first player who looks sus during a meeting, teaching the real Impostor how little pressure they are under.
Reading Body Language Before Among Us Tells You Who Is Lying
Since there is no health bar for suspicion, most of what separates a good crewmate from a bad one is memory: who was near Electrical when the lights went out, who claimed a task nobody saw them start. Visual tasks like Clean Vent or Chart Course matter because other players can watch them happen, so an Impostor faking one has to guess what the animation looks like from a distance.
Self-reporting a body the moment you find it is one of the least obvious beginner mistakes to fix. New players often run to tell everyone in person, giving the real Impostor time to fake an alibi, when calling the meeting immediately locks in the discovery instead.
By the time a lobby reaches its third or fourth round, most regulars have stopped trusting claimed tasks and started asking for visual ones on purpose, the point where Among Us stops being about tasks and starts being about who can lie longest under pressure.
Task Bar Progress, Visual Tasks, and the Swipe Card Problem
Tasks range from short single-stage jobs to long multi-stage ones like starting the reactor, and the task bar fills only when every living crewmate makes progress, so one AFK player can stall the match. The Swipe Card task has a reputation of its own: the card has to pass through the reader at a narrow speed, and missing it sends you back to try again, sometimes for several attempts while anyone walking past wonders why you’re standing at that terminal so long.
That single task is one of the more openly disliked parts of the game, and it has stuck in players’ memory more than most sabotages.
Sabotages give Impostors a second tool beyond killing: reactor meltdown and oxygen depletion force crewmates to split up and fix two locations at once, while cutting the lights or comms makes everyone easier to pick off.
Vents, the Engineer Role, and Sabotage Timing
Vents are normally an Impostor-only shortcut, letting them cross the map and reappear with an alibi before anyone connects the two locations. On MIRA HQ, the vent network is dense enough that one entry point can indirectly reach almost every vent on the map.
The Engineer role changes that balance by giving a crewmate the same vent access, disorienting the first time you see a fellow crewmate disappear into a vent and assume the worst.
Advanced players time sabotages around meetings rather than random moments, cutting the lights right after a body is reported so the chaos covers a second kill.
From the Skeld to the Fungle: Five Maps in Among Us
Among Us now runs across five maps: the Skeld and MIRA HQ are the smaller starting points, Polus is a sprawling outdoor base that swaps security cameras for a different tracking system, the Airship is the largest of the set, and the Fungle is the newest, a ground-level jungle map.
Lobbies support anywhere from four to fifteen players, and that range matters: a four-player round with one Impostor plays almost like a chase, while a fifteen-player lobby with extra roles like Scientist, Shapeshifter, or Guardian Angel turns into a slower information game.
Some regulars still prefer the Skeld specifically because its layout has been studied for so long that vent routes are common knowledge, removing some of the map-learning excuse when someone gets caught lying.
- What happens if you fail the Swipe Card task in Among Us? Failing just resets the swipe and lets you try again immediately, but it keeps you standing at that terminal in full view, which is often more costly socially than the failed attempt itself.
- How many players can join a match of Among Us? Lobbies support between four and fifteen players, and the experience changes a lot across that range since more players mean more roles like Engineer or Scientist can be turned on.
- What is the difference between the Skeld and Polus in Among Us? The Skeld is a compact spaceship with security cameras, while Polus is a larger outdoor base that replaces cameras with a separate tracking system and more walking distance.
Among Us keeps working because none of its systems are actually that complicated on their own; reading a task bar, remembering who stood near the vent on Polus, and calling a meeting before someone else does are enough to turn a five-minute round into the thing your group replays for an hour after.
What actually happens when four employees fed up with their jobs decide the only way out is up? In Bugscraper, the answer is a bug-infested skyscraper, an elevator that only goes one direction, and a boss’s office waiting at the top of a building that does not want you there.
Climbing Floor by Floor in Bugscraper
The structure is a roguelike shooter built around vertical progress: players fight through floor after floor of a skyscraper overrun with bugs, riding an elevator upward as they clear each level. Every floor resets the threat in a new arrangement, so memorizing a single safe route doesn’t carry over to the next run the way it might in a level-based shooter.
New players tend to treat early floors like a formality before the “real” difficulty starts, which backfires quickly — Bugscraper doesn’t ease players in with a slow ramp so much as expect mistakes to cost floors of progress.
Since it’s built as a roguelike, no two runs climb the tower the same way. What upgrades and weapons show up, and in what order, changes what strategy actually works floor to floor.
Solo Runs Versus a Full Elevator
Bugscraper works as a solo climb or as local co-op with up to four players packed into the same elevator car. Playing solo means owning every decision about which upgrades to prioritize; playing with a full group changes the calculus entirely, since covering more of a floor at once comes with the tradeoff of splitting the same pool of loot four ways.
Coordinating who grabs which upgrade becomes its own layer of strategy once more than one player is climbing together, especially when two players want the same weapon type and only one drop is available.
How many players can join a Bugscraper run?
Up to four in local co-op, or one player climbing solo — both are fully supported ways to play through the tower.
Does Bugscraper change each time you play?
Yes. As a roguelike shooter, the weapons, upgrades, and floor layouts vary run to run, so a strategy that worked on one climb won’t always apply to the next.
Bugscraper turns a mundane premise — employees sick of their jobs — into a genuinely tense climb, and whether you’re covering a floor alone or splitting an elevator car with three other players, the skyscraper’s bugs make sure the trip to the boss’s office is never a straight line up.
The recoil in Ragdoll Duel 2P does not work as expected. Instead of just sending a shot forward, every trigger pull kicks your ragdoll’s arm backward, and that kickback is the real aiming tool the game hands you. Players who expect a straight, predictable shot usually lose the first couple of rounds, since success here comes from reading the recoil instead of fighting it.
How the Recoil Actually Aims Your Shot
Your character’s arm is heavy and slow, drifting into position rather than snapping to a target the way a normal shooter would. The recoil force is what actually does the aiming: each shot pushes the arm opposite from where the bullet just went, so firing twice in a row without adjusting sends the second shot wide. Good players tap instead of hold, using short bursts to nudge the arm back toward center.
This only becomes obvious once you’ve actually played a few rounds: the “aim” is never really where your input suggests, it is wherever the accumulated recoil has dragged the arm. Newer players spam the shoot input as fast as possible, which feels intuitive but fights the physics the game is built on, and a missed read can cost an entire round. That imprecision is part of the joke, but it is also the mechanic beginners misjudge most.
Best of Three Rounds in Ragdoll Duel 2P
Each match in Ragdoll Duel 2P is decided across rounds rather than a single exchange. Landing enough hits drains an opponent’s health indicator to zero and wins that round, and the first side to take three rounds wins the match outright before moving on to the next opponent. A single lucky read on the recoil is rarely enough on its own.
Two icons sit near the arena: a heart that restores health when clicked, and a bolt that boosts shot power, and timing either matters almost as much as timing the shot itself. Losing a round is not fatal, since the next round resets health, but it hands momentum to whichever player reads the recoil more consistently.
Controls, Coins, and the Upgrade Shop in Ragdoll Duel 2P
In 2-player mode, both duelists share one screen and one keyboard: Player 1 fires with the W key, Player 2 with the up arrow key, and movement is automatic. Switching to 1-player mode changes the input to a mouse click or the spacebar against a bot instead, and casual players who just want a quick round default there since it needs no second participant.
Winning matches earns coins, spent in a shop split into two tracks: strengthening the avatar raises maximum health, while upgrading the pistol raises how much power each shot carries. Neither stays optional for long, since the 1-player bot gets tougher after every round it loses.
Players chasing every upgrade grind early rounds for coins, a different mindset than someone playing 2-player mode purely for bragging rights over a friend, where upgrades matter less than who reads the recoil better. A heavier pistol shortens rounds but does nothing if health drains first, so some lean into avatar upgrades instead to outlast their own recoil-timing mistakes.
Questions Players Ask About Ragdoll Duel 2P
How do you aim in Ragdoll Duel 2P?
Through recoil rather than direct control. Each shot kicks the arm backward, and the next shot fires from wherever that kickback left it, so players adjust by timing bursts instead of holding the trigger down.
What do the heart and bolt icons do?
The heart restores health when clicked and the bolt increases shooting power, both usable mid-round to shift a fight that is going badly.
How many rounds do you need to win a match?
Three. Health resets between rounds, so a loss early on does not end the match, only the current round.
Ragdoll Duel 2P stays built around one contradiction: a weapon that never fires quite where you expect, in a body too heavy to move faster than a drowsy stagger. Between the recoil force, the three-round format, and a shop that keeps the bot’s escalating difficulty in check, the skill being tested is patience with a system designed to wobble.
There is no official BOMBANANA 2 yet — the original BOMBANANA! has not even reached its full August 2026 launch, let alone a sequel. What follows is informed speculation about what a follow-up could plausibly look like if it builds on the systems the first game has already shown through its Campaign and its Puzzle Modules, not a report on any confirmed feature.
What a BOMBANANA 2 Could Build On
The core of BOMBANANA! is the three-way split between the Blind Monkey, the Mute Monkey, and the Deaf Monkey, and any sequel worth the name would almost certainly keep that asymmetry intact rather than replace it. A more natural next step would be widening the puzzle space around that same trio rather than adding a fourth role, since a fourth player would dilute the exact bottleneck that makes the original tense: three people, three missing senses, no spares.
Returning players from BOMBANANA! would likely recognize the shape of a BOMBANANA 2 Puzzle Module immediately, even if the specific bombs were new. The first game already demonstrated, through its Campaign, that difficulty can be raised just by making the Mute Monkey’s manual longer or the Blind Monkey’s panel layout more disorienting — a sequel could lean harder on that instead of inventing new mechanics from scratch.
The custom bomb-building mode already in the original is the part most likely to expand. A sequel could plausibly turn player-built bombs into something shareable between groups, letting one trio’s design get handed off to a completely different trio to attempt — a natural extension of a mode that already exists, rather than a speculative leap.
Where BOMBANANA 2 Would Likely Diverge
Some ideas would be new territory rather than an extension of what’s already shown. A BOMBANANA 2 could introduce bombs that force the three roles to physically move around a shared space instead of staying fixed at one screen each, which would push the communication problem from “translate what I’m hearing” into “translate what I’m hearing while also not being where I’m supposed to be.”
Voice-restricted communication is the entire identity of the series, so a sequel could experiment with restricting it differently per level — swapping which sense each monkey loses from one Puzzle Module to the next — rather than keeping the Blind, Mute, and Deaf roles fixed for the whole run. That would be a bigger structural change than anything confirmed for the original, and should be read as one plausible direction among several, not a prediction.
- Would BOMBANANA 2 still require exactly three players? Almost certainly, since the entire puzzle language of the series depends on three broken channels of information meeting in the middle — dropping to two or expanding to four would undercut the premise the first game is built on.
- Would a sequel replace the Blind, Mute, and Deaf Monkey roles? Unlikely. Those three roles are the identity of BOMBANANA!, verified directly from the original’s own design, so a sequel replacing them outright would essentially be a different game wearing the same name.
None of this is a roadmap — it’s a reasonable guess at what a BOMBANANA 2 could look like if it grows outward from the Blind Monkey, Mute Monkey, and Deaf Monkey trio the first game already built, rather than an announcement of anything actually in development.
Every report that lands on Luna Youngman’s desk in Scrutinized looks almost normal — a phone’s worth of photos, a few texts, a purchase history — until one detail refuses to add up, and deciding what that detail means is the entire game.
Luna Youngman’s Job in Scrutinized
Players take on the role of Luna Youngman, a Criminal Investigations Analyst for a District Attorney’s office and the leader of a local neighborhood watch, tasked with identifying a killer hiding among anonymously submitted reports. Each case hands over a mixed bag of evidence — cell phone images, police reports, purchase records, text conversations, social media accounts, and search history — and the job is to comb through it and judge whether the person behind it is actually a threat.
Nothing in Scrutinized is handed over pre-sorted. Evidence across different sources has to be cross-referenced against itself, since a single piece of evidence rarely tells the whole story on its own — a suspicious purchase means something different once it’s checked against that same person’s search history or a contradicting timestamp elsewhere in the file.
New players tend to fixate on the most obviously alarming piece of evidence in a report and rush to a verdict, missing a quieter detail elsewhere in the same file that actually changes the read on the case.
Reading Evidence That Doesn’t Announce Itself
The tension in Scrutinized comes from how ordinary most evidence looks at a glance. A photo, a receipt, or a text thread rarely reads as damning by itself; it’s the accumulation of small inconsistencies across multiple sources within the same report that separates an innocent person from an actual threat.
That format rewards patience over speed. Players who slow down and check every category of evidence in a report before deciding tend to catch discrepancies that a faster read straight past.
What kind of evidence do you review in Scrutinized?
Cell phone images, police reports, purchase records, text conversations, social media accounts, and search history, all submitted anonymously as part of each case Luna Youngman reviews.
Who is the player character in Scrutinized?
Luna Youngman, a Criminal Investigations Analyst for a District Attorney’s office who also leads a local neighborhood watch, tasked with identifying a killer through the reports she’s assigned.
Scrutinized works because the evidence never announces its own significance — Luna Youngman has to build a case out of details that only matter once they’re checked against each other, and it’s that slow accumulation of small inconsistencies, not one obvious smoking gun, that actually catches a killer.
The shield in Duo Vikings 3 does not work the way a shield usually does: instead of only blocking hazards, it doubles as a makeshift glider that carries the Yellow-Bearded Viking across gaps the Red Viking cannot clear alone. That detail sets the tone for the whole game, where the two heroes are built to fail alone and succeed only when their tools line up.
Duo Vikings 3 is the third entry in the castle-crawling series, keeping the same two characters: the Red Viking, smaller and helmetless but carrying a hammer heavy enough to smash walls and enemies in one hit, and the Yellow-Bearded Viking, slower but armored with a shield that blocks hazards, glides over pits, and can protect his partner. Neither Viking finishes a level alone, and the exit only opens once both reach it.
The Shield Trick Duo Vikings 3 Never Explains Upfront
Most players assume the shield is purely defensive at first, since early rooms only ask you to block a swinging hazard. The glide function shows up a level or two later without warning, and the first time a gap is too wide for the Red Viking’s jump, the answer is usually to send the Yellow-Bearded Viking across on the shield instead of hunting for a hidden platform.
Movement uses A and D or the arrow keys, jumping is W or the up arrow, and the hit or use action on S or the down arrow does different things depending on which Viking is holding it.
Beginners often brute-force a room by rushing one character ahead, only to realize the level was built around both being in specific spots at once. Backtracking for the slower Viking costs more time than moving together from the start.
Why the Red Viking’s Hammer Is Not Just an Attack Button
The hammer breaks walls and crushes enemies, but it also smashes breakable objects that block a path or hide a trigger. Completionists chasing every hidden panel swing at anything that looks slightly different from the surrounding wall, since later rooms disguise these sections as ordinary scenery.
Difficulty rises gradually: early rooms teach one mechanic at a time, but once rising platforms, spike pits, and color-coded doors appear in the same room, a single mistimed jump can undo several steps of progress.
A room pairing a smashable wall with a spike pit expects the Red Viking to clear the wall before the Yellow-Bearded Viking glides across what’s left, and that sequencing is easy to miss the first time through.
Pressure Plates, Timed Buttons, and Color-Coded Doors
Duo Vikings 3 leans on a small set of recurring mechanisms, and knowing what each demands saves a lot of restarts.
Pressure plate: a floor switch active only while a Viking stands on it, usually meaning one hero holds position while the other moves through a door that opens only while it’s weighted down.
Timed button: a switch that opens a door or platform for a fixed window before resetting, forcing both Vikings to move the instant it’s pressed rather than one at a time.
Lever: a mechanism that toggles elevators or gates permanently once pulled, often placed opposite the door it controls, so pulling it can trap the wrong Viking on the wrong side if the order is off.
Color-coded door: a locked path tied to a switch or plate elsewhere in the level rather than a key you carry, and rooms combining one with a timed button stop being about one trick and start being about sequencing several without a mistake.
Switching Between Both Vikings When You Play Duo Vikings 3 Alone
Solo players control both heroes by switching between them, changing the rhythm of every puzzle since timing a pressure plate against yourself means planning the sequence before moving. Some rooms that feel trivial in local co-op turn into a slower, more deliberate puzzle running both Vikings solo.
Local co-op on a shared keyboard is still how most people experience the later castle rooms, since timing windows on some levers and timed buttons get tight enough that switching characters mid-puzzle costs precious seconds.
Players chasing a clean solo run often pre-drop the Yellow-Bearded Viking on a pressure plate before switching to the Red Viking, faking the timing a second player would normally provide.
Does Duo Vikings 3 have a single-player mode?
Yes, solo players switch control between the Red Viking and the Yellow-Bearded Viking at any point, though every puzzle relying on the shield’s glide or a held pressure plate has to be planned before moving.
What does the shield actually do in Duo Vikings 3?
Beyond blocking hazards, the shield lets the Yellow-Bearded Viking glide across gaps and can protect the Red Viking from an incoming attack, making it closer to a second tool than a defensive item.
Are the levels in Duo Vikings 3 harder than the earlier games?
The core mechanics carry over, but later castle rooms combine pressure plates, timed buttons, and color-coded doors more often, raising difficulty without introducing anything new to learn.
Duo Vikings 3 keeps circling back to the same idea: the Red Viking’s hammer and the Yellow-Bearded Viking’s shield are only half a solution each, and the castles are built so neither works without the other standing in the right spot.